7th grade handwork instructions for remote learning projects
spring 2020
Dear 7th grade, I wish we could finish our year in handwork in person. But, the next best thing is finishing our projects! I hope these instructions offer you some help with either your zipper pouch or your eye mask pillow. Please email me if you have questions. Make time each week to do some handwork. And since we cannot read together while we stitch, see if you can get a family member to read out loud to you while you work. I miss you all very much. — Ms. Jennifer
EMBROIDERED AND HAND SEWN POUCH WITH A ZIPPER
SUPPLIES
2 pieces of fabric 6.5” x 11” each, for embroidery
2 pieces of fabric 10” x 11” each, for pouch lining
1 piece of fabric 6.5” x 11” for base of pouch
10” zipper
embroidery floss, sewing thread, needles, pins, transfer pen, embroidery hoop, scissors
REMEMBER!
Use a length of thread or floss no longer than your upper arm to fingertip (or twice that if doubling) so that your thread doesn’t tangle.
Use a double knot at the end so your thread does not pull through.
STEP ONE:
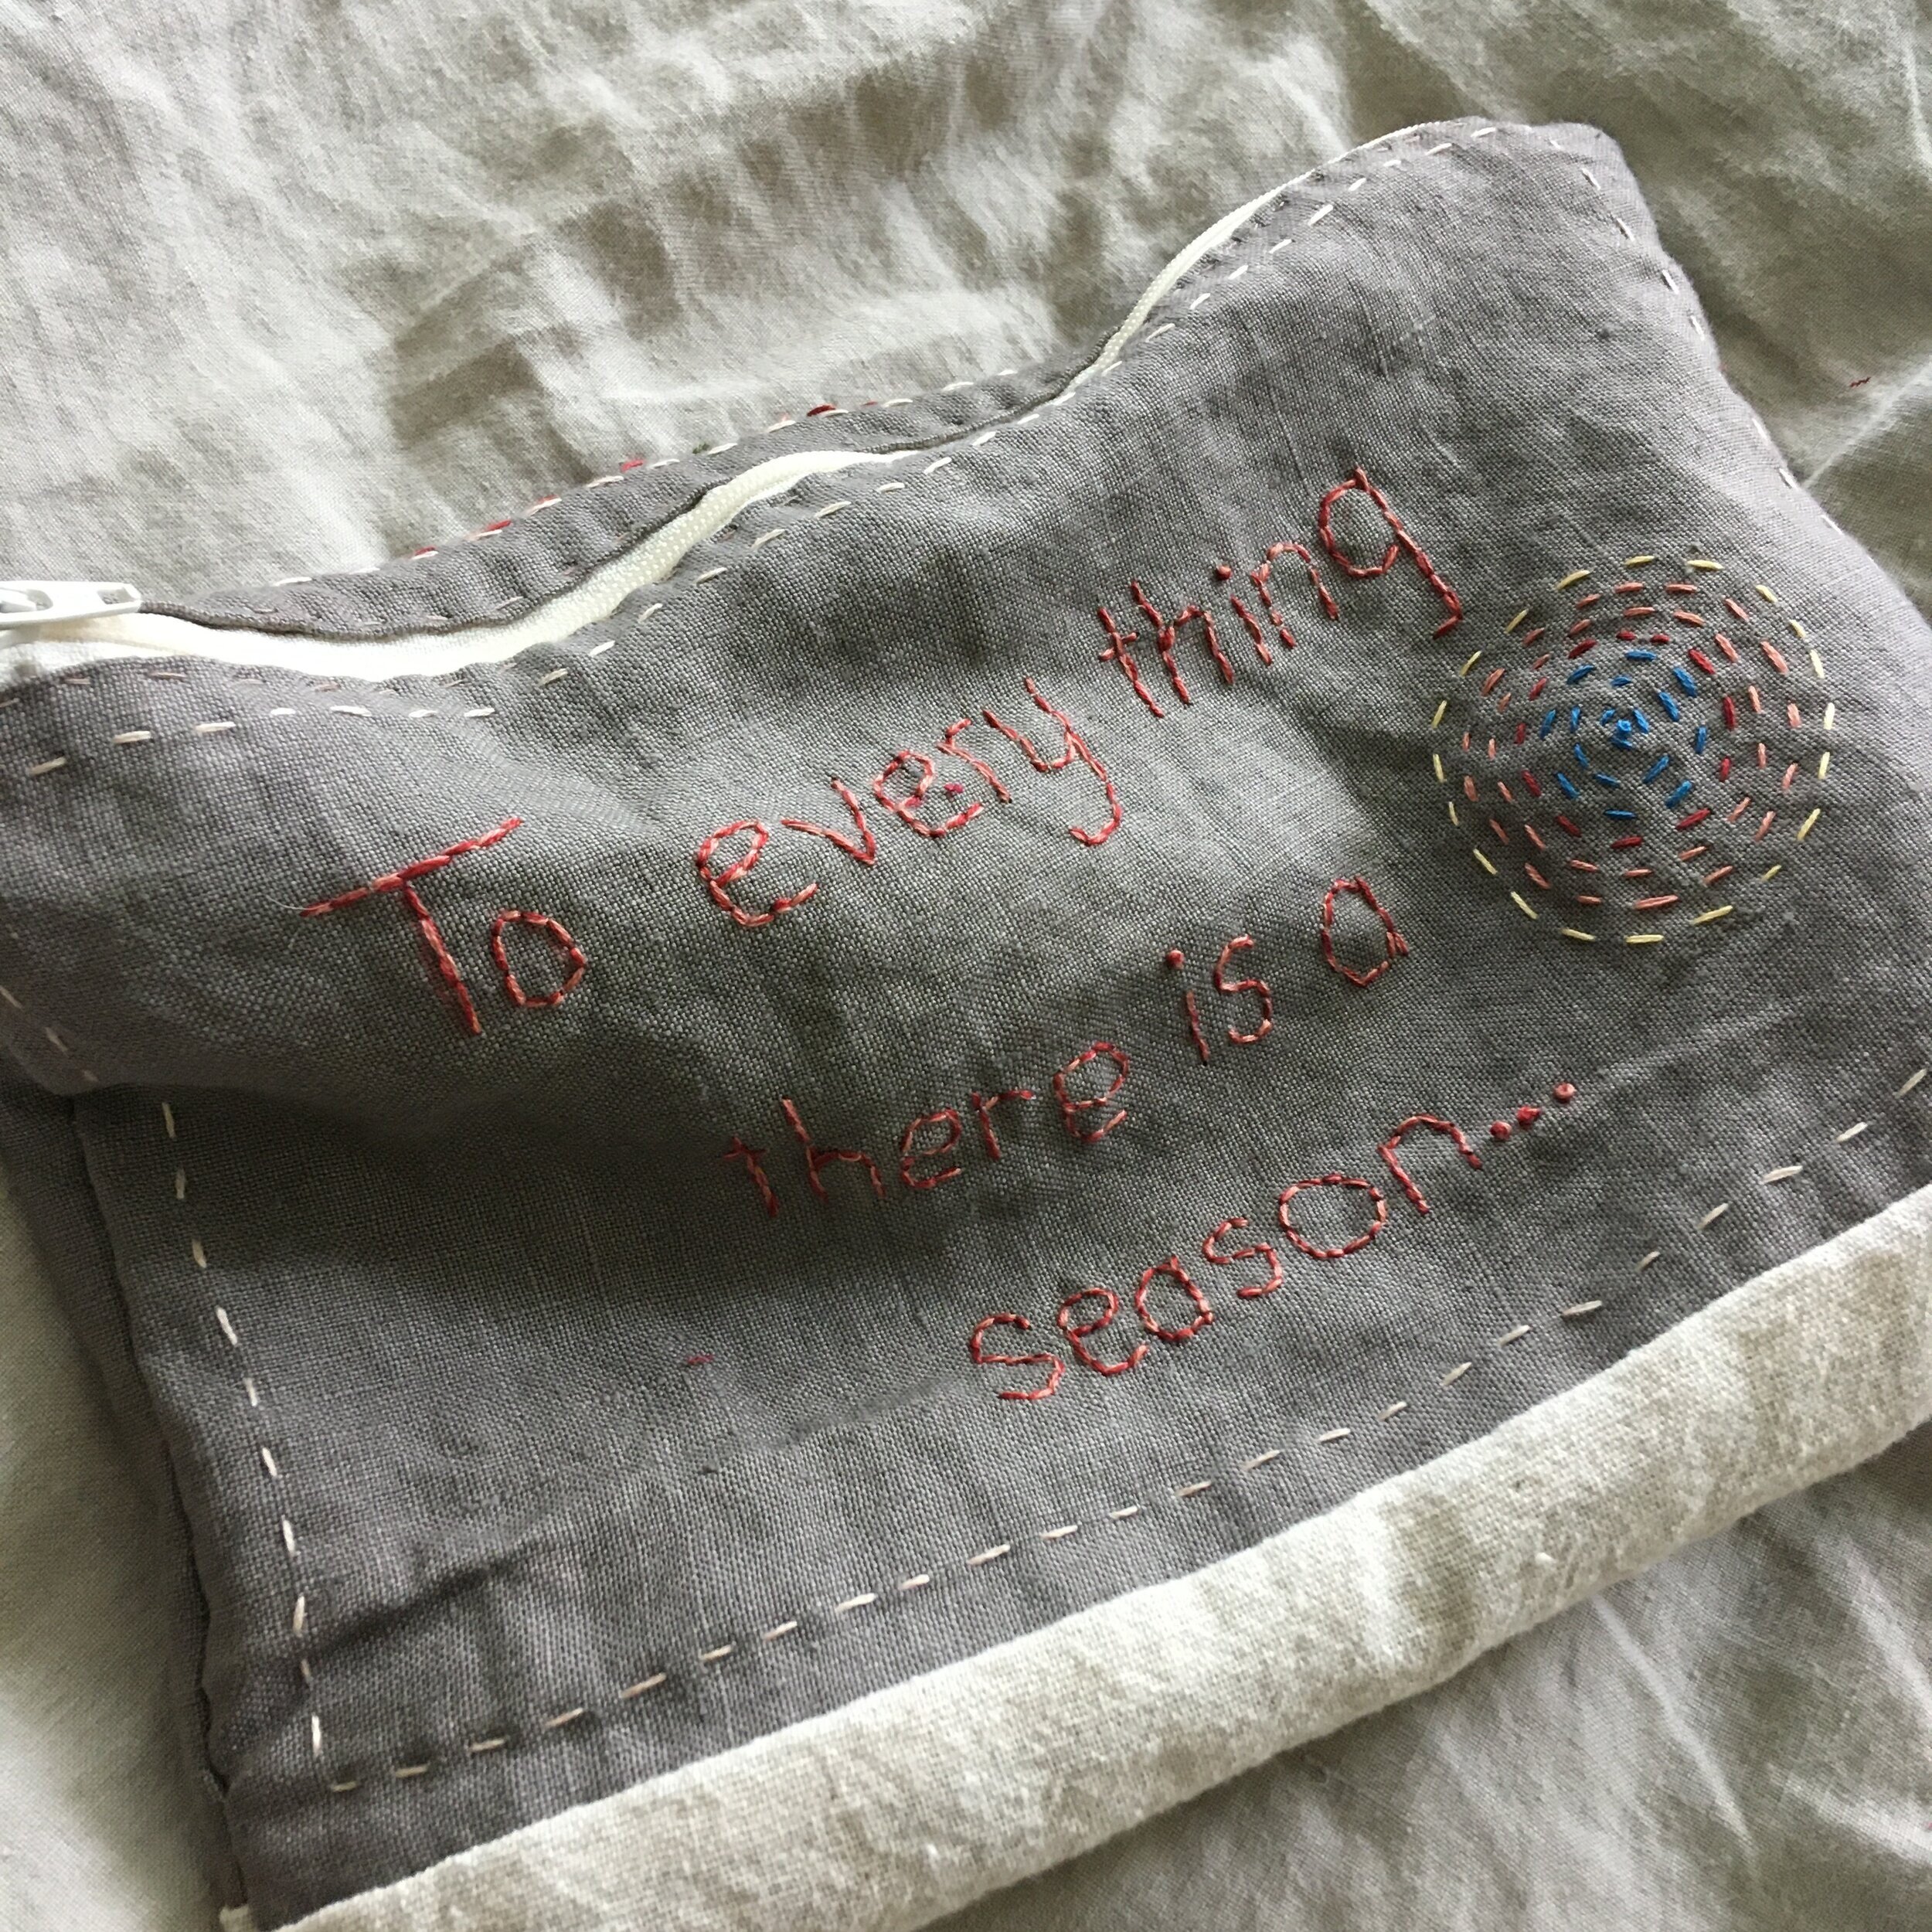
Embroider each of your 2 pieces of fabric intended for embroidery. Embellish an inspirational quote on one piece while you decorate the other side with a picture or design of your making. Use a variety of stitches! Review your handwork notebook for ideas.
STEP TWO:
Hand sew your embroidered panels to your pouch base to create the outside (public side) of your pouch.
Pin the RS (right side) of the base fabric to the RS bottom of one of your panels.
With doubled sewing thread, sew together using a backstitch and a ¼” seam allowance. Note: keep your stitches small and tidy for strength and neatness.
Repeat for the other embroidered panel. Before you start, check to make sure your pieces are oriented correctly — you want the bottom of each panel sewn to the base so that when you lay it flat with the RS up, one panel “reads” upside down.


STEP THREE:
Attach the zipper. You will be sewing the lining and the outside of your bag to the zipper in turn.
Start with one piece of the lining fabric. Note: If you don’t have a clear RS to your lining fabric, decide before you sew and mark each RS with a pin. Fold over with RS facing up, and pin to the underside of the zipper. Be careful not to sew too close to the zipper teeth! Repeat on the other side of the zipper with the other lining fabric piece. This step is easiest to do with the zipper closed.
Flip the zipper over so that it’s RS is facing you. Attach the top of one side of your embroidered piece to the zipper by folding it under 1/4” and stitching it with a neat running stitch over the visible line of stitching from the lining. Note: You will see both sides of this stitching so keep it neat. This step may be easier to do with the zipper opened up. Make sure you are only pinning one side of the zipper and lining and remember to keep the lining clear of your stitching here.
Repeat for the other side. You will sandwich the lining fabric between the embroidered fabric as you bring the second side up to the RS of the zipper.
Open and close your zipper a few times to make sure you haven’t caught any fabric too close to the zipper teeth in your sewing. Notice that you can see the shape of your bag but the side seams are open still.


IMPORTANT! Before you go on, make sure your zipper is open at least halfway. If you forget this step, you will not be able to turn your pouch right side out after sewing the side seams. That would be irritating! Fixable, but irritating.
STEP FOUR:
Sew side seams to create your pouch.
Turn your project inside out so that the WS (wrong side) is facing you. Smooth your lining fabric over the top of your embroidered fabric to doublecheck the length of the lining. It should lay just a bit longer than the base of your pouch. If it much longer, trim it neatly. Do a final zipper check — is your zipper open at least halfway?
Match lining pieces together with RS facing each other and WS facing you. Match embroidered pieces together in the same manner. Pin side seams together. Take extra care where your base fabric meets and at the zipper to line everything up. At the bottom of the lining pieces, make sure you mark and leave a 2-3” opening so you can turn your project right side out.
Sew your partial lining bottom and side seams with a tidy back stitch.


STEP FIVE:
Finishing
Turn your pouch right side out through the opening at the bottom of the lining. Check the areas at each end of the zipper. Neaten any openings here with whip stitching. This also reinforces this “stress point” of your pouch.
Pull the lining back out (the RS is facing you) and fold opening edges in. Whip stitch this opening closed. This seam does not need to be invisible as it will be at the bottom inside of your pouch.
As a final step, wash and dry your pouch. This helps everything settle together.


Admire your work! And use it well.
Eye MASK pillow
SUPPLIES:
two rectangles of fabric, approx. 9 x 12” each
embroidery floss, sewing thread, a needle, pins, transfer pen, scissors, embroidery hoop, funnel
stuffing, including dried beans and lavender
STEP ONE:
Using your transfer pen, trace eye mask pillow pattern onto the piece of fabric you will be embroidering. If desired, you can add another line 1/2” inside of your outline to mark the border of the area available for embroidery.
Embroider with images of your choice. Think about things that relax you (or that relax your recipient!).
STEP TWO:
Cut the mask shape out following the outline you traced from your pattern.
Trace and cut a second piece from the other rectangle of fabric to be the underside (eye side) of your pillow.
STEP THREE:
Place the two mask pillow pieces RS (right sides) together and pin around. You will need to leave a 2” opening along the straight edge at the top of the mask so you can turn the pillow out when done, so mark this opening with doubled pins.
Sew around (except for your opening) with a tidy and small backstitch. Since you will be stuffing this piece, make sure your seam is strong and made with small stitches that are close together.
Make sure you are happy with your seam. With a pair of scissors, make vertical cuts into the seam allowance at the curves. Be careful not to cut your backstitch! This will help the curves lay smoothly.
STEP FOUR:
Turn the mask pillow right side out.
Using a funnel, add your stuffing. Lavender adds a relaxing smell. Small dried beans add a pleasing weight. Do one or both. You decide.
Fold the raw edges of your opening to the inside and pin shut. With neat and tiny stitches, blind stitch or whip stitch the opening closed.
Admire your work! Find a comfortable place to lie down and try it out! Bonus points if you use it in the yoga pose where you put your legs up a wall. Or, if you go outside in some grassy spot where you can hear the birds.